Overview
This guide aims to help users get started with the functions and options of the RushFiles Mac client.
Customers of white-labeled RushFiles partners are advised to contact their RushFiles reseller for download links to their branded Mac client and web client URL.In this article:
1) Requirements
Operating systems: macOS 11 and later.
2) Download and install
The Mac client can be found on the App Store by searching for RushFiles. It can be downloaded and installed from there.
NOTE: If you are currently using a version below 3.0.0, you must first uninstall that version by moving it from Applications to the Bin. Otherwise, you may not be able to log in to the new app.
There are a couple of steps that you have to perform the first time you start or log into the application:
✔ A prompt will be presented where you can enable or disable the collection of crash reports. Enabling this helps us uncover the cause of issues that result in a crash and fix them.

✔ A notification in the top-right corner of your screen will appear asking whether the RushFiles app is allowed to show notifications. Please allow it as we show important messages regarding the app status through these.

✔ You'll need to allow RushFiles to access Keychain to store your authorization token after log in when prompted.

✔ The last prompt will ask if you want to enable automatic start of the app or not. It is advised that you enable it as due to limitations of the FileProvider library, the RushFiles drive will be mounted after booting your Mac, regardless of whether the app is running or not. However, you won't be able to work with files in it as your connection won't be authenticated without the app. In this state, you will see a message when opening the drive in Finder: "Open RushFiles app in order to sync..."
✔ After the "RushFiles is ready to use" notification appears, open the RushFiles drive in Finder and click the Enable button on the "RushFiles is not enabled" message.

These are all steps that you have to perform only the very first time you run the app and log in.
3) Log in/out and settings
✔ Right after installation, you will see that RushFiles is running in the menu bar (top-right corner by default). Left-click this icon to open the UI, then on the Gear icon in the bottom-right corner of the UI.

✔ Click the Log in button to start logging in.
✔ Your default browser will now open the login page. Type in your email address and click Next.

✔ Type in your password on the next screen, and click Log in. If you're using 2FA, then you'll also be asked to type in your authentication code on the next screen.

✔ Another site will open, and your browser will ask if the RushFiles client can log in using your credentials. Click Allow.

✔ You are now successfully logged into the RushFiles Mac client.
✔ If it is your first time running the app or logging in, please see the installation section on how to proceed.
✔ The message "RushFiles is ready to use" will appear as a notification (if enabled) once all your shares are loaded. This signals that the drive is available in Finder and you can start working with your files.
✔ To log out, simply click the RushFiles icon on your menu bar, click on the Gear icon, then on the Log out button.

✔ Your default browser will open, informing you that you're logged out of the application.

3.a) Settings menu
You can reach the setting menu by left-clicking the client's icon in the menu bar on the top, clicking on the Gear icon, then on the Settings button.

In this menu, you have the following options available:
✔ Automatic start. Check this option if you want the client to automatically start when you turn on your Mac. It is advised that you enable it as due to limitations of the FileProvider library, the RushFiles drive will be mounted after booting your Mac, regardless of whether the app is running or not.
However, you won't be able to work with files in it as your connection won't be authenticated without the app. In this state, you will see a message when opening the drive in Finder: "Open RushFiles app in order to sync..."
✔ Keep local file. Here, you can set the time period downloaded files will be kept for on your Mac. Please note that macOS may still evict files from the cache if you're low on space on your local drive. It is the operating system that decides which files to evict, so they are not guaranteed to stay on the drive for the duration specified in this setting.
✔ Enable or disable the collection of crash reports.
✔ Logout. Click this option if you want to log out of the application. If you're logged out, you'll see the Login button here instead.
Language selection was previously available in this menu. Starting from 3.0.0, the application automatically uses your macOS system language if it is available in RushFiles. Otherwise, English is used as the display language.
3.b) Share list
You also have an overview of all the shares you have access to. To see this share list, left-click on the client's icon in the top-bar.

✔ Click on the folder icon next to a share. This opens the share in Finder.
Renaming shares locally is no longer possible starting from version 3.0.0
4) Working with files
If you the installation was successful, and you are logged in to the client, you will see a RushFiles drive in Finder. This drive functions just like any other drive on your Mac.

You can, among others:
✔ Copy files.
✔ Move files. (Only inside shares; files cannot be moved between shares)
✔ Rename files.
✔ Edit files.
✔ Delete files.
✔ Create/Delete/Rename folders.
Note: Drag & drop on the drive moves the item. Hold down the Option key while Drag & dropping an item to copy it instead.
Only two things are not allowed: Creating folders on the root of the RushFiles drive (this can only be done in the web client), and moving data between shares (the root folders of the RushFiles drive).
Files that are not downloaded to your computer are marked with a small cloud icon. These files need to be downloaded before they can be accessed, which requires internet connection. You just need to double-click on such a file, and it will be automatically downloaded and opened with the relevant app. You can also select Download Now in the context menu to download them or Remove Download to remove them from your local disk.

Files that are already downloaded do not have any icon. These files are accessible and editable even without internet connection. Your edits will be uploaded the next time you connect to the internet.
Files locked using RushFiles have a red lock icon overlay. These can be unlocked by the user that locked them.

RushFiles lock
Files that are in a share that you have read-only permissions to are displayed with the macOS lock icon overlay.
 Read-only lock
Starting from version 3.0.0, files can be searched for in Finder. However, since File Provider loads the drive content on-demand, only those files "exist" on the drive that you have seen or downloaded, subsequently only these files are returned as search result.
4.a) Context menu
On top of this, you also have access to the RushFiles context menu, automatically installed as a Finder extension. To open this menu, right-click a file or folder on the RushFiles drive. The specific options are detailed below.
 |  | ||
| Context menu of a non-cached file | Context menu of a cached file |
The following options are available:
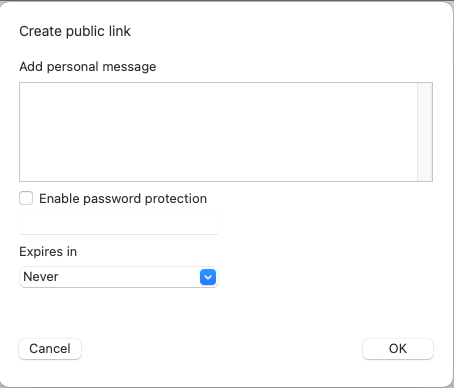
✔ Create link in clipboard. This option creates a public link to the file or folder. The link can be customized according to your account's settings. When it is created, the link URL is placed in your clipboard, ready to be pasted anywhere.
✔ Send link in Email. Works just like the Create link in clipboard feature, but instead starts a new email with the link URL already pasted in using your default email app.
✔ Available offline. Choosing this option downloads the entire content of the folder, and keeps it locally available at all times. Changes done remotely to this folder are downloaded locally as they happen.
✔ Lock file / Unlock file. You can lock a file for editing with this option. While a file is locked, only the user that locked it is able to make changes to it. Only the user that locked it, or a company administrator can unlock a file.
✔ Download Now. With this option, the file is download to your local cache. If done on a folder, all the content stored in it is downloaded. Remote changes done to cached files are automatically downloaded.
✔ Remove Download. The file is removed from your local cache. If done on a folder, all the content stored in it is removed.
On any file on the RushFiles drive:
✔ Create link in clipboard. (See above)
✔ Send link in Email. (See above)
✔ Download. (See above)
✔ Lock file / Unlock file. You can lock a file for editing with this option. While a file is locked, only the user that locked it is able to make changes to it. Only the user that locked it, or a company administrator can unlock a file.

5) Uninstallation:
✔ Quit the client. You can do this by left-clicking the client's icon in the top-bar, clicking the button in the bottom-right corner of the Share list window, and choosing Quit.
✔ Open Finder and go to Applications.
✔ Select the RushFiles app and Move it to Trash.
6) Log file location:
Whenever you submit a ticket about an app issue, it helps a lot to attach relevant log files. These can be found at the path below:
/Users/yourusername/Library/Group Containers/SMTN535HNY.group.com.rushfiles.clouddrive/Logs